Tour of Fabric Printing Facilities
Posted: September 30, 2014 Filed under: Maker Leave a commentThe fabric printing department next to the Fab-Lab was introduced to the makers with the possibility for inductions for people interested in fabric and screen printing. Initially I was not that interested but after the tour, talk and a look at the work being done in there by students and chatting to those students I have changed my mind. Flicking through the many sample books and seeing all the different techniques effects and skills used in pattern and fabric print production I was really intrigued, so I for one am hoping on having an induction in there soon.
I think it would go really well with my first Seed project : The Deck Chair. At the moment I am investigating whether I could make a sun lounger/deck chair from a singe sheet material, currently I am exploring the use of fabric, pleated or sculpted. I also intend to research and make a plywood cell backed fabric that can be shaped and locked into position…
I think the I would like to pattern my finished outcome, what ever material form it takes as i have found that I feel pattern is almost an intrinsic part of the sun lounger/deck chair, it should be bright and interesting to reflect positive feelings, sunniness and a summer vibe. One route into this would be to start exploring and collecting pattern sample and looking at their production methods, how am I going to get ‘x’ pattern onto ‘x’ material, what medium will I use and what techniques are involved.
Here I see the opportunity to learn and develop new techniques, skills and perhaps a new way of looking at a project. I have only worked with pattern and reproduction in a limited and small way, quite some time ago now. I am excited to see where this could lead. As well as the physical methods of printing, pattern making and dyeing there is also digital printing and stitch. The printers are expensive to run however for inks, dyes and fabric e.g. One type of silk costs £20 per metre. This also requires Photoshop and Illustrator skills and perhaps a few other pieces of software along the way.
So what I need to think about is:
- Am I using fabric in my chair design? If so what fabric? Multiple fabrics?
- Do I want a patterned fabric?
- Do I want a textured fabric?
- How much importance does colour and pattern hold?
Gas Bottle Bowls
Posted: September 20, 2014 Filed under: Maker Leave a commentWhilst studying foundation I made a series of small enamelled copper bowls which ended up with the production of a large copper enamelled bowl taken from the bottom of an immersion heater. This was my final outcome for the body of work, I fired it in a glass kiln, it was pretty risky as my tutor (Carol Gwizdak) and I were unsure if it would flux properly or if it would burn out. I wanted to continue this work and create a series of large enamelled metal bowls. And now I have the chance too.
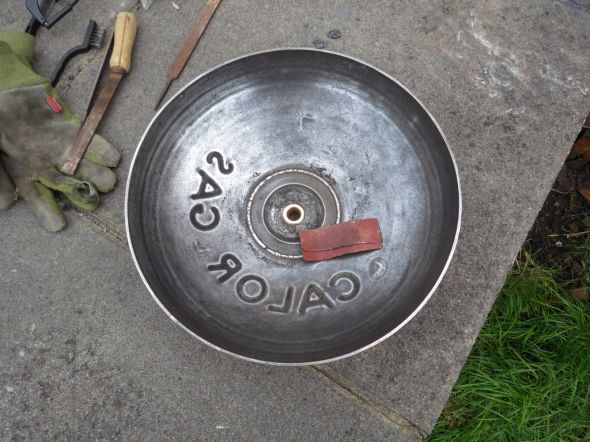
The summer after I had finished my foundation I found two medium gas bottles in the hedge at a popular fly-tipping spot a couple of miles form my village. I took them home and after cutting off the valves with a hack saw and leaving them to soak full of water for a few months I cut the tops and bottoms off leaving me with 2 bowls.
Now I want to clean these bowls in preparation for milling the rims level, sandblasting and then enamelling their inner surfaces.
Now I need to start brainstorming some designs to put on the inner surface of the bowls, I think the designs will follow suit of the original large copper bowl and be fairly free and expressive.
MB Finearts Bronze Foundry Work Experience
Posted: September 1, 2014 Filed under: Maker Leave a commentOver the months of July and August I spent a total of 3 works working at M.B. Finearts Foundry with its’s owner Mr Martin Bellwood. The work done there varies from sculpture to signs to other non metal casting work. I mostly worked on sculpture.
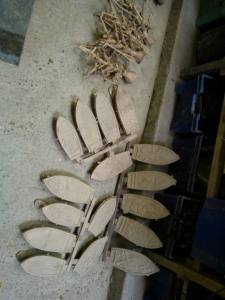
During my first week I was introduced to a large variety of processes and techniques in most areas of the foundry (excluding the wax room). The first day I spent making silica sand moulds, these were larger than any I had made before and these particular ones were thinner than I was used to making also. The first things I cast were 2 pieces of driftwood to be used as base plates for two Helen Sinclair sculptures. Martin is a good teacher; he’s clear, patient and happy to answer questions of which I had a many. The foundry staff were all friendly and interesting people from seemingly all walks of life, I got on well with them and felt I could ask them for help should I need it. The sand moulds were made in large metal frames which had cross pieces that supported the sand.
The mould is sealed with a graphite/paraffin solution, this is ignited, after it has burnt out it leaves a thin protective layer over the delicate sand mould casting surface and also makes less likely for the sand to stick to the pieces.
These moulds are then clamped together to stop them expanding whilst pouring, if the moulds were really big and heavy they may not have needed this. This helps ensure a clean cast with no flash and no step to the cast where the mould lines are.
Once the metal has cooled the sand mould is broken away with a hammer to reveal the work.
The work is now either sand blasted or pressure hosed to remove as much casting material as possible quickly, a blasting cabinet or hand tools are then used to remove trickier bits. The work is then cut off the runners and risers and re-detailed and polished.
Some other things I worked on:
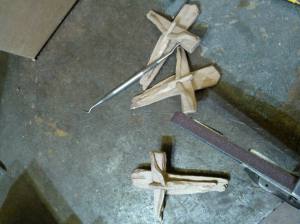
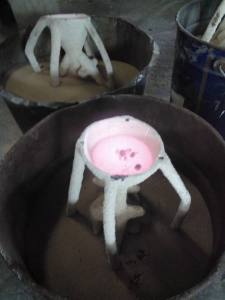
On my second day I spent the first half of the morning cutting up a large old vandalised bronze sculpture with a big angle grinder, it was hard sweaty work and I was soon covered in bronze glitter dust. After that I helped to prepare the workshop for the bronze pour by tiding away arranging tools and making ready supporting sand buckets for casting trees. The trees come out of the bottom loader kiln and are placed in the sand buckets with sand poured in around them to support them during the pour and keep them upright. The flames rushed out of the kiln top about 8ft as the wax melted and the ceramic walls fired. After lunch the bronze trees (crucifixes) were poured, this was all very exciting with lots of smoke, flames, noise and a great fierce relentless heat. Excess metal in the crucible is poured into ingot moulds were I could see the separation of the copper, zinc and tin with zinc burning off the top all bright yellowish green. Zinc fumes are very bad! They make you feel faint, give you headaches and cause your limbs to shake uncontrollably (bit like short burst of severe flu).
On my third day I learnt to use a large variety of tools in different ways for example; how to use files in different ways to achieve different marks, different ways to use angle grinders (got quite good at getting the cutting wheel close to the work so less grinding was needed), I also used a range of compressor powered air tools for grinding and sanding and shaping and detailing. With large dremel like tools I cleaned up mould lines and flash and resculpted lost detail caused by the runners and risers. I learnt to use a tap and die tools to thread my own bolts and holes for sculpture mounting points – when threading a bolt the starting end must be tapered to allow the tap to cut into the material, once it gets going make complete turns and then reverse half a turn to remove the burr thus allowing you to continue threading.
On my last day I spent the morning preparing the crucifixes for the local church for engraving and staining. That afternoon was a bit quieter, Martin showed me his experiments at using 3D printing in bronze casting to do direct pour out moulds using PLA. We did some scanning experimentation with 2 of his many scanners. One was a very expensive hand held scanner that had its own software, the other an Xbox Kinect. We found the Kinect easier to use although the detail was nowhere near as good. We used the stl. file we had just created to print of a 7cm or so high bust of my head and shoulders in black PLA.
After my week of work experience several weeks later I had an email from the foundry offering me more work which I was excited to take, and so I worked for two more weeks gaining loads more experience before heading off to uni. I hope to go and work for the foundry again in the future and to continue my growing relationship and experience with bronze casting.


Recent Comments