Making First Glazes
Posted: October 29, 2014 Filed under: Maker Leave a commentI made my first glaze today following a recipe that I found on one of the university glaze example boards.
Title: Flux Variations Project – Line Blend, Claire Philips, S6.
Base Glaze B
- Feldspar : 35%
- Ball Clay : 12%
- Whiting : 17%
- Flint : 19%
- Variation
- E Frit : 17%
- Cobalt Carbonate : 0.25%
- Red Iron Oxide : 0.50%
I screened this 3 times through 100 mesh screen 3 times, although I think now I should have done 2 80 mesh screenings and 2 100 mesh screenings.
Before going to the glaze room I spent quite a long time researching glazes to see which ones I would like to create and soon ended up with a long list and a problem…how to decide which to do first. I used books from the library and ceramicist friends and the internet to find examples that I liked and wanted to try. Initially I thought to do a real simple one, but then that i wanted to challenge myself, and so decided to go for the slightly more complex one that I had seen on the uni example board. The whole thing went well and I am keen to return and do more glaze making. I have lots of glaze test piece tiles bisque fired, so im thinking I shall try and make around 10 100ml glaze sample recipes to try out ( all stoneware at 1250-ish) so as to get lots of different examples out of one firing.
Plaster Lathe
Posted: October 25, 2014 Filed under: Maker Leave a commentMaking Chuck
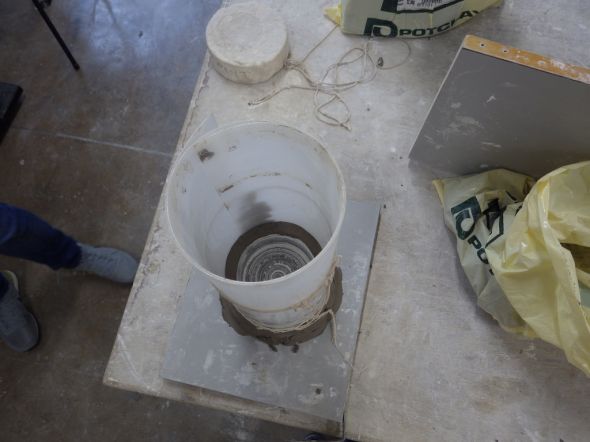
The sort of bowl shaped plaster chuck is placed on a clay board or bat and held in place with plastic clay around the thread and under the shoulder of the bowl. A wall is then constructed around the chuck, this is made from a 1mm thick sheet of plastic into a cylinder and held in place by two strings top and bottom. Around the base of the plastic cylinder press a thick sausage of clay and smooth it onto the plastic and the bat creating a seal all around. Its worth spending some time getting the cylinder as straight as possible, this means less work centring later on and less plaster wastage. A small amount of clay can go around the inside of the plastic cylinder tube where the wall meets the chuck metal collar and rub it smooth, this stops plaster going where it isn’t wanted. Good plaster for turning is Prestia Plaster, it is finer quality than potters plaster, mix 950g to a litre of water. It take’s longer to go off than potters plaster so leave it to soak – or ‘slake’ – for 2 minutes before mixing. Scoop off any surface bubbles then pour evenly and in a controlled way into the chuck mould.
Loading Chuck
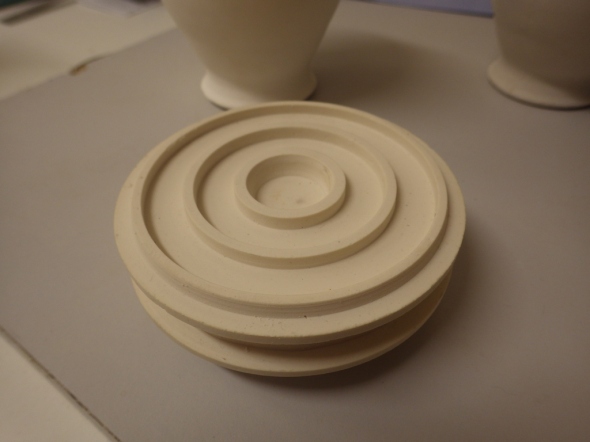
Take a wrench and lock the chuck drive shaft to make it easier to load up the plaster chuck. Turn the plaster next to the chuck shoulder to make a neck, make this a few cms deep and wide – this is preparation for when it comes to cutting your work off the chuck.
To Centre
Once the chuck is loaded and a collar has been carved it is time to centre the plaster. Un-centred plaster has a very visible wobble, centred plaster runs smoothly with no wobble. Move the tool rest as close to the plaster as you can without the spinning mass hitting the rest. Place your tool on the rest bevelled side down, using a pointed tool push the tool in to the plaster a couple of mm all along the length of the plaster several times until the whole mass has lost several layers and the wobble disappears. Smooth out the plaster mass with a flat edged tool and begin creating the form you want.
Continue to keep the tool rest/guard as close to the work as you can throughout the lathing process.
Finding Form
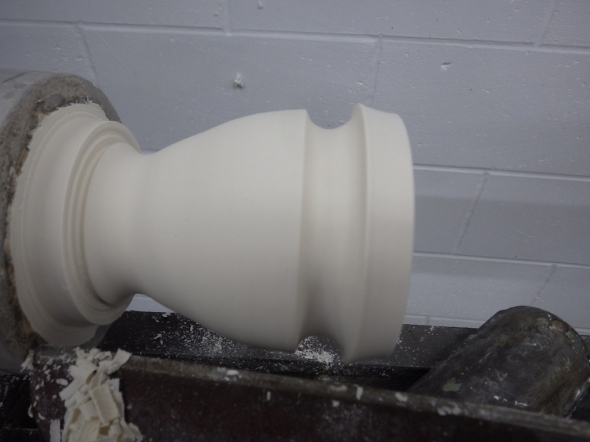
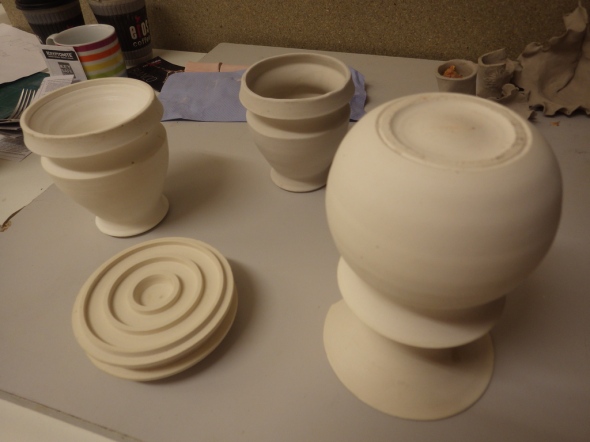
On my first chuck I improvised two forms, just visualising a shape in my head and then doing my best to realise it in the spinning plaster. Its very satisfying to work, its very immediate and pleasing to watch your form unfold and evolve. The second chuck I worked was inspired my some quick drawings and exploratory sketches I had done the night before, so as to have an idea of what I wanted to make and to try making something I had premeditated rather than improvising.
Different Tools
So far from my small amount of experience I have found that I use the different tools as so:
- Pointed – centring, deep thinner lines, deep ‘v’-shaped grooves, fast rough shaping.
- Flat – Smoothing centred chuck and shaping, softening shaping by pointed tool and for making large bold lines, trenches and curves.
- Round – Smoothing rounded forms and for necks, fluted mouths and form interiors.
- As my experience grows so shall my knowledge of lathe tools capabilities and alternate uses. Next time I want to experiment with using both a rubber and thin steel shaping kidneys to shape curved and rounded forms.
Further development from here ; more chucks and slip casting turned pieces, just build up experience and try and create some forms to slip cast and then sell….
Manual CNC Machining the Rim of Gas Bottle Bowl
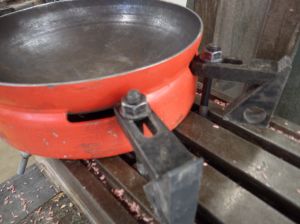
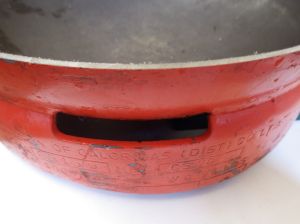
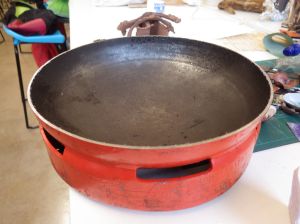
Posted: October 16, 2014 Filed under: Maker Leave a commentThe gas bottle bowl that has been sitting on my workbench for a while now finally got some work done on it today. I was able to get some advice and help from Keith the technician concerning the clamping of the bowl to the work bed surface. The bowl still has its large foot ring with its small cutaway ledges which it turns out are perfect for clamping it down tight, although it still took quite a while to get it all secure and ready to go.
Eventually after an hour and 15 mins the thick steel wall rim had been cut down about 5mm in all and is now perfectly level. What remain to be done is the foot ring to be cut off and the bowl sand blasting before enamelling.
By the time the bowl gets to the enamelling stage I will need to have sorted out the designs that I want to decorate the interior – the subject I want the large bowl pieces to speak of is water problems. That is: water scarcity, water politics, water pollution, ecosystem destruction and sea life conservation. This would be continuing a theme from my foundation year. The water theme is one I studied whilst doing a geography A-level and is an issue I think needs to be talked about more and to which more attention must be brought too so that people can get on board with how to prevent or deal with these problems.
The other end of the gas bottle – or the opposite bowl – also needs its rim cutting down to make it level and even. This one however will be much harder to clamp down to the work bed as it is the valve end with no fancy foot-ring to clamp it down with. It may require the construction of a special jig to hold it fast and steady for cutting. I think I shall continue with the current bowl through to being a completed object for the moment and then tackle the valve bowl when I get to it.
Kiln Induction and First Kiln Loading and Firing
Posted: October 15, 2014 Filed under: Maker, Subject Leave a commentToday’s induction was hosted by Matt the Ceramics TD, who showed the group how to arrange shelves and ceramics work in the kiln for a bisque firing. We then got to load up a bisque kiln partially under his direction.
The kiln room boasts several large electric kilns which are of varying ages, and a few large gas kilns, all front loaders, a few electric top loaders are available too with a couple specifically for glass and enamelling. I intend to use the glass kilns for large enamel pieces in the near future. The shelves are stacked in the kiln using 3 kiln props for each shelf, 2 at the back one at the front – 3 points of contact are more stable or at least easier to get stable than four points. The first shelf goes on props not the base of the kiln. There are specific shelves for specific kilns (such as size, thickness), also check that shelves are not bent, they sag over time and use. Load shelf then props then work then next shelf etc. Smaller work should be placed at the bottom of the kiln with bigger work at the top – this is thought to be a more stable arrangement and lets bigger pieces fire better and to ‘soak’ in the hotter top of the kiln. Remember to leave gaps between glazed work of at least 1cm. Use the powdery side of the shelf face up for the work to sit on – this stops glaze run-off sticking and cracking shelf.
The main risk in using kilns are overfiring and, if careless, burns to skin or face. The kiln must be turned off at the right time so carefully preparation and monitoring is essential. Bisque firing vent closes at 600C and glaze firing closes at 300C. The spyhole bung must remain in at all times when not observing pyrometric cones. The kiln casing can also get super hot so watch out when working around them.
Pyrometric Cones
- Used for measuring heat and glaze behaviour mark point.
- The cone is positioned to the left of the spy-hole in a small blob of clinker clay leaning on its base, it is positioned as stated so that when it bend in the heat it is still visible. When the cone reaches the shelf surface the kiln has hit its required temperature and should be turned off. (If spyhole is hazy with gases when viewing cones then open the top vent for a few seconds to clear it then cover up top vent again.
- Only open the kiln once it has cooled below 150C.
Kiln Regulator
- Start on 20-50% to get up to temperature.
- Don’t set the temperature regulator to 100% straight away!
Matt’s Firing Guidelines
- Start the kiln on 10% for 1 hour.
- Next hour turn to 30%.
- Probably about 300C by this point – close top vent on the kiln (600C if bisque).
- Then 50% for an hour.
- Then 75% for an hour.
- Then 100% to cone up to cone bending.
- When the pyrometric cone is fully bent turn to regulator to 0% and switch off at plug.
- Next day when kiln is approx 100C it will be ok to open.
- ! When loading kiln be careful not to break the temperature probe at the back of the kiln, its very fragile!





Recent Comments